

I was initially going to buy some skips from Fenris games but thought I better give making some a try before spending money that I could be spending on mount leadverest. The ones Fenris are selling are the more 'traditional' looking skips that you would hire if you were doing some heavy DIY, but due to the materials that I have I've gone for a bigger more heavy duty skip.
Here's the finished first Skip:


All it needs to finish it is some kind of stencil logo or company name across the middle and it's done:
I've put together a step by step below if anyone wants to give it a shot themselves:
Here's the tools and materials needed:

1. The Main body of the skip is a .22 bullet box that I received as packaging for some ebay mini's, I've no idea how easy these are to come by in the UK but American readers shouldn't have any problems :)
2. Matchsticks, I got a big pack of these from 'The Works' (Discount Art & bookstore)
3. Coffee stirrers, I managed to grab a ton when I was at London zoo that should keep me going for an age
4. Cocktail Sticks, these came from poundland 6 packs for a pound
5. Lastly some old business cards of mine

Tools
Super Glue, Sprue clippers, drill, craft knife, scissors.
Step one:

Step Two:

Once these were dry I scratched up the surface with the blunt side of a knife to give the surface a more worn look.


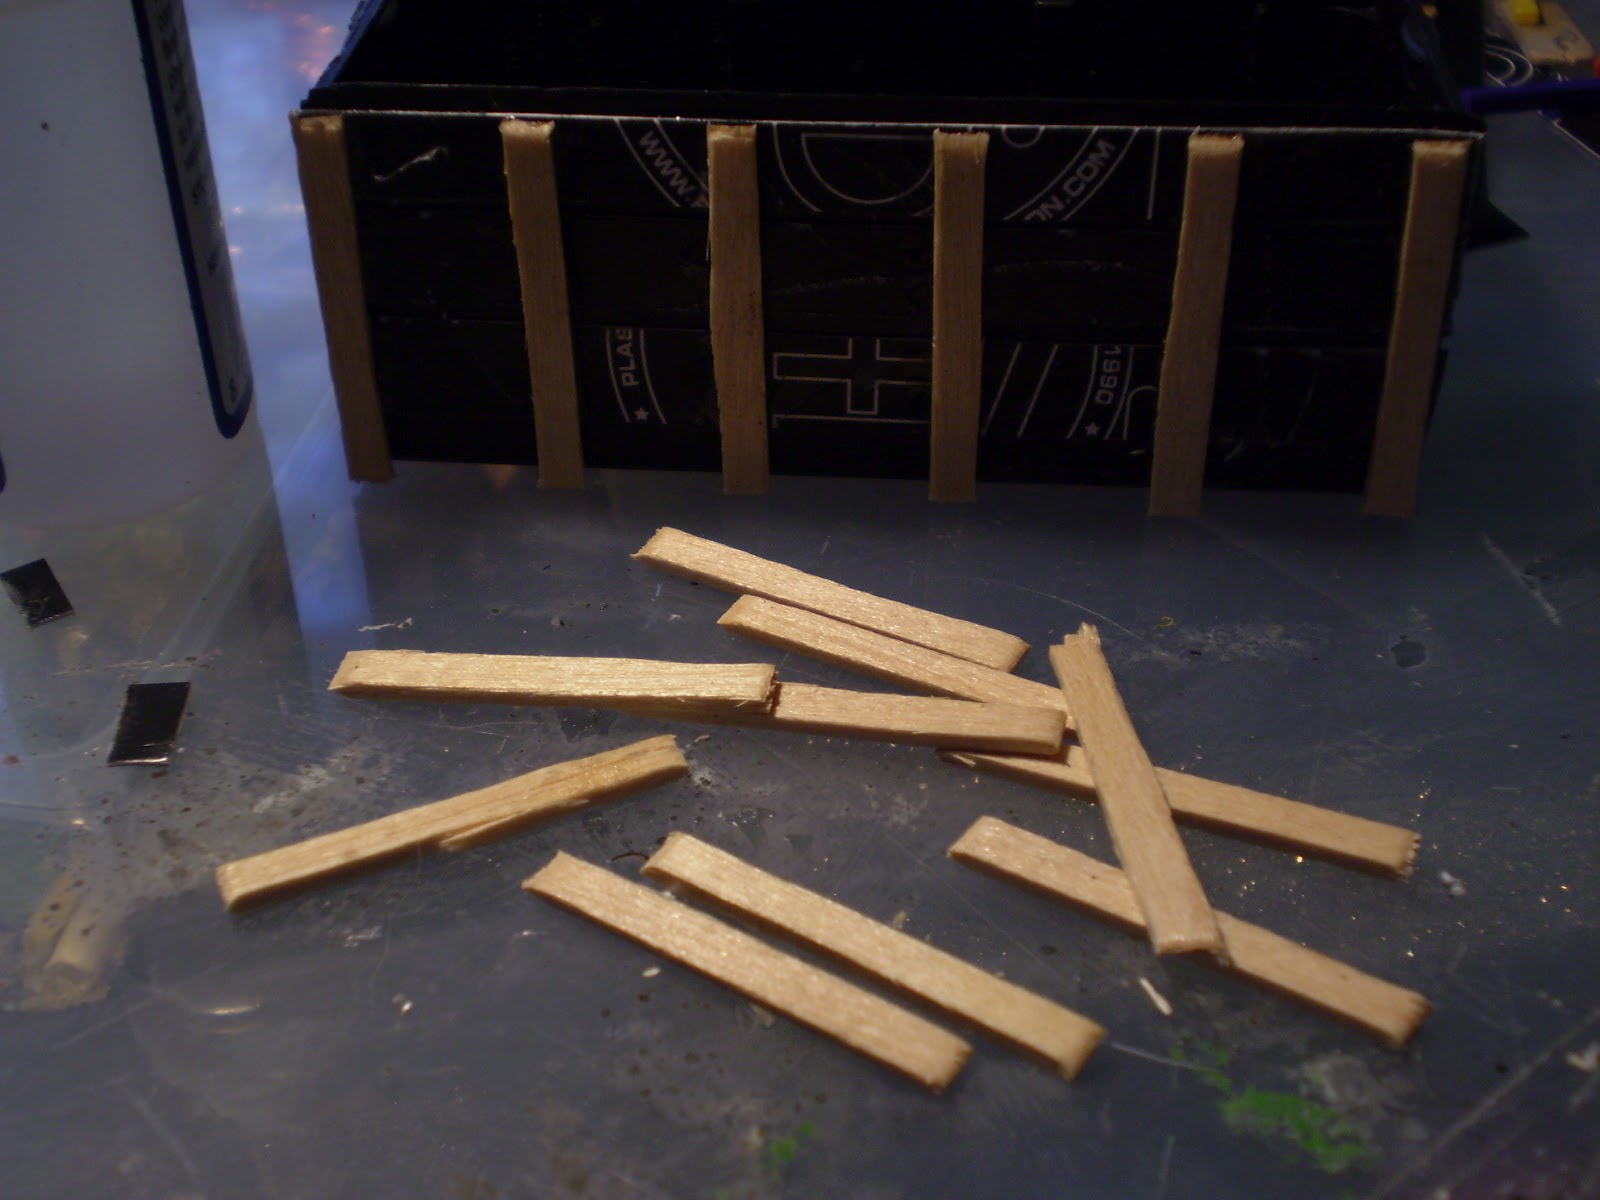
Next cut your newly slimmed down stirrers into 16 equal length sections (6 for each long side and two for the shirt sides). When you glue these to the sides make sure you leave a small gap at the top of each of the long sides ready for the trim.
Step 4.
Take your match-sticks and glue them to the small gab that you should have left above the coffee stirrers. On the shorter sides add three match sticks (top, Middle and bottom)

For the truck hitch (I think) at the end of the skip again get your coffee stirrers out and cut off two equal length short sections. Drill two small cocktail stick width holes in each section and attach them to your cocktail stick and then to the interior of the skip. Once this is attached to the skip you can trim off the excess cocktail stick.


To get the rusty finish I picked out some of the edges and surfaces with bestial Brown, then Blazing Orange and finally Mithril Silver decreasing the amount with each colour.

Here's the finished Skip

I also knocked up some refuse from excess green stuff, I was trying to capture the shiny black bin-bag look but I think I've got a little too heavy on the white, I'll probably revisit them and give them a black wash to knock them back. Inspired by the Brians and Guts blog I decided to create some pallets but got bored and only managed one :)


Now thats a damn shame when people are throwing away a perfectly good zombie like that. Those skips (roll-offs as we call them in Illinois) look great. I agree your bags need more black on them.
ReplyDeleteAre zombies not already technically recycled, so throwing away zombies would be re-recycling...?
DeleteI think I might make the last of my bullet boxes into a Biohazard skip/roll-off so then I can jam it with ton's of zombies and zombie parts :)
Very nice. Those skips look great. I keep meaning to make some pallets. too, and yours came out great. Thanks for more cool inspiration.
ReplyDeleteThanks very much, I really need to make a ton of pallets as I'm planning to have a warehouse at some point but making them was so fiddly I can't really face it
DeleteGreat looking skips and simple to make to! Thanks for the tutorial!
ReplyDeleteNo worries thanks, I've got one more bullet box to use up and then I think I'm done on the refuse front :)
DeleteI need to try this out! Love that we can inspire each other like this! Thanks mate
ReplyDeleteNo worries, I love the sharing of knowledge that blogging and the internet has brought to the hobby, it's certainly given me a ton of tips and ideas. Even something simple like stockpiling coffee stirrers was a revelation to me that never crossed my mind but now thanks to the internet I can't stop stealing them :)
DeleteGreat looking skips and nice tutorial. The paint job is awesome. They actually look like steel and heavy as they should. I might make a couple for my city as well. Thanks
ReplyDeleteThanks very much, I'm really happy with the way they turned out. I've got one more to do but I think I'll try and crack through some zombies instead. I really need some cargo containers next, and need to find a way to make them on the cheap.
DeleteA very nice scenery tutorial and your finished models look fine to me. Job's a good 'un, as we like to say!
ReplyDeleteAgain thanks very much, your blog was one of the reasons why I've become totally immersed in the zombie side of things :)
Delete